Showing posts with label fabric store. Show all posts

Friday, April 22, 2011

Friday Night Tutorials! - Flat Bottomed Purse by sewtogether.com


I've been ultra busy this week putting together a really nifty store for us so I didn't have the time to actually make something. However, I came across this awesome tutorial and I simply must share!

This is an amazing blog and I suggest checking it out by clicking the link.

See you next week! Happy Easter!

Friday, April 15, 2011

Friday Night Tutorials! - Easy Pet Bed

I've had dental surgery the other day and I'm a little off. A little off meaning highly medicated. There is no way to spend a Thursday like getting a piece of metal worth more than my car jammed in my face. So while this is tutorial, it is more of an excuse to show off pictures of my cats. (Like I said, I'm medicated.)

This is a super easy and fun project that you can do with fabric pieces laying around.

What you need -

- A piece of thick fleece, I used stuff that looks like faux sheep skin that they use on jackets.

- Fabric like a heavy cotton or canvas. I was lucky that I had these large manufacturer swatches that are 25" by 25". I used 2 of those. If you are using other fabric you can use a quarter of a yard which is 24".

- Scissors or rotary cutter.

- Sewing machine. I am sure you can hand sew this but with the thick fleece stuff I think it would be a pain.

- Needle and thread for finishing.

- Optional - Polyfill stuffing.

Directions -

- If you have a long piece of fabric simply cut it to make it 2 - 24" by 24" square pieces. If you have swatches or if the piece isn't perfect simply lay the fabric on top of the fleece and mark all the way around. I don't think the cats will mind it is wonky. Have fun with sizes.

- Cut your 2 pieces of fleece.


- Place right sides together and begin to sew. Leave an small opening on one side so you are able to turn it right side out. Repeat with the other fabric and fleece. NOTE - When sewing the loft of the fleece was crushed so I ended up with a lot of it over the edge. Don't worry just cut off the excess.

- This step is totally optional. Take the stuffing and stuff it to give it some body. Don't overfill like you would a pillow. You need a little give for fat cat butts.

- Hand sew the openings closed.

- Take the 2 pieces and place them on top of each other. Hand-sew three corners while leaving the other open. Fold that side open.


And you're done! To be honest I think the cats would have been happy if I just threw the fleece on the ground and were probably laughing at me for going to all the trouble but I think it's a cute little project for beginners and kids. It was fast and the kitties loved it.


Thanks so much for reading. Remember our Spring Stock Up sale is still going on. Visit our Etsy and Artfire shops for more info. Also, remember to follow us on Groupon so we can offer awesome coupons!

Friday, April 8, 2011

Friday Night Tutorials! - Trim Headband

When you deal with fabric as much as we do suffice it to say it gets the ol' creative juices flowing. I was in the drugstore not too long ago and saw these elastic and lace headbands for sale for 7 bucks. Insane. Making these types of headbands are so easy and so inexpensive I am sort of embarrassed to post this tutorial. The hardest part of this project is picking out the trim you want to use. You can use any sort of trim for this project. Lace, gimp, rope, strips of fabric (like the ones in Jellyrolls or what have you), ric rack, sequins...the options are endless.

They work up really quick and you can make a headband to match any outfit. You could even make headbands for your bridesmaids or even for a children's party. It is that easy and the results are beautiful.


What you need -

- Trim of your choice. I used some of our kitty trim, floral trim and rhinestone trim. You could actually use any trim for this.
- Sewing machine or needle and thread if hand sewing.
- 1/2" Elastic
- Scissors
- Tape measure (Couldn't be there for the photo, the cat was trying to eat it.)

Instructions -

Measure your head in the way a normal headband would lay. Remember that number.

Cut piece of trim so it runs from the bottom of one ear, over the top of your head and then the bottom of the other ear. I find that this is best since you get the most trim coverage.

Measure that trim piece and subtract that from the whole measurement of your head. That's how much elastic you need. Then again I winged it and I am sure you can too. If you want the headband tighter then make the elastic less, looser use more elastic.

Thread a needle and lets get sewing!

With the floral trim I simply overlapped the trim and the elastic and zigzagged across a few times one both sides. This is easily hand-sewed.


With the kitty trim the trim end is larger than the elastic. So I just folded into a nice point, placed the elastic underneath and sewed across. If you are hand sewing you can iron the point so it stays while you sew.


It was a little more difficult with the rhinestone trim. I wanted to make a double headband, sort of a Grecian look. I love my machine too much to subject it to hard little rhinestones and plastic so I hand-sewed this one.

- First sew the 2 strands together.


Then start to sew them on the elastic. Repeat for other side.


And voila! You have awesome headbands that cost mere pennies. We all have random trim hanging around so this is not only great for using your remnants but also wonderful as a first sewing project.

I hope you liked this tutorial. Check out our Etsy and Artfire shops for all sorts of interesting trim! We also have a great sale going on so get clicking. Check back next Friday for a new tutorial.

Thursday, March 17, 2011

Getting to know your fabric! - Rayon

In store I have noticed that even the most experienced sewers don't know their fabric! I think when you are doing a project, it is important to know what you are working with.

When I first started with Sew What's New, I knew nothing about fabrics other than the ones that were covering my own tushie so I have spent a lot of time learning about fabrics and their uses. I have in essence become a fabric nerd and I am not even close to knowing it all. Want proof? Ask me to pronounce "matelasse". It isn't pretty.

I think the fabric that gets the worst rap is rayon. A lot of people think it's like polyester, a synthetic fabric. I am happy to report that it is not a synthetic at all as it is a produced of wood fiber.

Really.

Here is what Wikipedia has to say about the subject...

Rayon is a very versatile fiber and has the same comfort properties as natural fibers. It can imitate the feel and texture of silk, wool, cotton and linen. The fibers are easily dyed in a wide range of colors. Rayon fabrics are soft, smooth, cool, comfortable, and highly absorbent, but they do not insulate body heat, making them ideal for use in hot and humid climates. The highest quality Hawaiian shirts produced between the 1930s and the 1950s that are most sought after by collectors are all made of rayon.


In other words, Rayon is wonderful for warm weather clothing but also great for linings for coats and jackets. I also find it has a great drape and when mixed with other fibers such as cotton or polyester, it adds a softness that only rayon can produce. You can find rayon in home decor fabrics, dress making fabrics and even some trims! Also, if you are concerned about Mother Earth, nothing is more biodegradable than rayon. It actually degrades faster than cotton

What I find interesting that some companies are producing a "synthetic rayon" that while it looks like rayon, it is missing that certain rayon "feel".

How can you tell if the fabric you are purchasing is rayon? It's easy! Simply burn an edge. Make sure you are in a well-ventilated area. Have a cup of water present just in case. Take a strip of the fabric and hold a lighter to an edge. Let burn for at most a second and inspect the burnt edge. Rayon burns much like cotton. It burns rather quickly and leaves a crumpling ash. I find that rayon, unlike cotton, smells like burnt paper whereas cotton smells more organic like burning leaves. Or just ask us. We like to burn things.

Here at Sew What's New, we have hundreds of yards of all different types of rayon in all types of colors and prints. It is my personal favorite. Check out our Etsy, Artfire shops or stop in to see some amazing rayon that I just know you will love for all your projects.

Thursday, November 18, 2010

Sale!!


Get this. Our whole online Etsy store is on sale starting tonight at Midnight! That means any invoice over $20 is half off! So, if you order over $100, you only pay $50!!

This happens only once a year and is a great way to stock up for the Holidays!

Here is how it works...

Head over to our website http://sewwhatsnewfabrics.com/ and click on our Specials sections to find a coupon to use only online on our Etsy site only on November 19, 2010. You will need to sign up for Etsy and have a PayPal account to place your purchase. This coupon can only be used online and will not be honored in store.

You get a huge 50% discount on your invoice of $20 or more!! Shipping is not included and discount is only off the items you purchase!

- The sale goes on all day till midnight 11/19/10.

- The coupon is not valid for previous purchases, can not combined and not valid for Alcantara fabric, faux fur, crewels and mohair velvets.

- Coupon code must be referenced to receive discount. Please wait to pay until a revised invoice is sent to you. Please let us know upon purchase if you wish to pick up your order in-store or have it shipped.

- Orders that are to be shipped must include shipping price! Orders will not be shipped or be able to be picked up unless invoice is paid in full.

- Someone will be online all day to answer all your questions. You can e-mail us at news@sewwhatsnewfabrics.com or Convo us on Etsy.

- If you want something special, please contact us and we can possibly find it for you!

So get all online tomorrow and get ordering! We can't wait to see you!

Monday, November 8, 2010

Making Christmas, Making Christmas...

While I realize that it isn't even Thanksgiving yet, it's hard not to get into the spirit of things when you work around fabrics like this one!

I hate to say it I have been thinking about Christmas since early September when I noticed some stores already pulling out their Christmas stock. This is the first year I am able to sew so I decided to plan early for all those handmade gifts I plan to make. (but probably won't, you'll see me at Macy's Christmas Eve for sure!)

Then again if you are the crafty type, nothing makes a present better than making it with your own two little hands. There is something special about something that you create yourself, it shows more love than just going to the store. Then again with how crazy shopping is, I think it's sort of the same thing. Alas, you can't beat that look that your loved ones get when they realize that you made their gift, just for them. That's the Holidays to me and they will be sure to remember it for life. Trust me.

Here at Sew What's New Fabrics we wholeheartedly believe that homemade is always the best and we have everything you need to make your crafts a success. From easy to make out of print patterns to great Holiday theme fabric, we have it all.

In the next coming days, we will be listing all types of great Holiday themed items like this..


and this...

AAaaah, I love bobbles.

So as you can see we are all ready for the Holidays. To help you get ready for the Holidays we are running our best Black Friday sale ever! Sign up for our newsletter on our website or visit our website starting this Tuesday 11/9 to find a coupon giving you 50% of your orders of over $20 or more online only on the 19th of November and the same coupon for use in store only Black Friday the 26th of November. Which means you have 2 times to save! In store and online!

Get those sewing machines and glue guns working because this is a big one!!

Monday, October 25, 2010

Boo!

*Disclaimer: This post is not intended for those with heart conditions, back problems, those who are pregnant, children or anyone with eyeballs.*

In the spirit of Halloween, I present to you the Most Frightening Fabrics Ever Created!

Ok, a little back story. Being that we have been in business for over 40 years, we have amassed a large variety of fabrics. Many are simply beautiful yet others, being from the time they are from, are slightly disturbing.

The Seventies was an interesting time. If the fabrics created then are any indicator, I don't know how anyone got out alive. It's "The Poltergeist", "The Shining" and most of the 70's all wrapped up in one. (You know, the part of the 70's your parents never talked about and still refuse to talk about except as death bed confessions.)

Take this for example,


A perfectly good Italian wool fleece that is warm and would make great throws or jackets. The kitties and fish are sweet, I get it but WHAT THE HECK IS GOING ON WITH THE SUN FACE THINGIE?!?!! The scary thing is that I was eating lunch right next to this thing and I had no idea. Spooky. It's like a prop from "Silence of the Lambs". I can imagine it draped over Buffalo Bills couch, something he snuggles into after a hard day of moth propagation and mayhem.

Furthermore,


It isn't the pattern of this fabric per say although green on green sort of makes me seasick but it's the fact that it's DOUBLE KNIT! Argh DOUBLE KNIT! Ooooohhh! This is something that the ghost of "Maude" would wear.

Then there are those fabrics that come straight out of the Eighties. It seems the Seventies had sort of a "Harvest Gold" patina over life. Sort of sweet and only slightly scary but then there were the Eighties where life was NEON.


Oy. This could be cute but unfortunately I'm over the age of 6 so this panel frightens me. You are looking at a fabric that you wouldn't want to meet in a dark alley. Only because you will walk out of said alley covered in Lisa Frank stickers, your hair dyed rainbow, humming "Girls Just Want to Have Fun".

THEN this unfortunate vista...


Yeesh. From the neon green Volkswagen Beetles to the brown Navajo print and the neon women sorting what I think are coffee beans (I hope.) and the parrots this fabric looks like it should be in a David Lynch movie. (After he had a couple of strong Mai Tais.)

Granted, these fabrics are utterly frightening but they are sort of like a car crash. You can't help but look. Alas, they all have this certain charm, of high quality materials and made by the best textile mills in the world. Like I always say, "one persons blinding nightmares is anothers' blinding treasure." In other words, don't take my word for it. I'll only demand that I see what you create from these fabrics and I promise I won't laugh!

If you just love these fabrics (and we even have more! Eek.) check out our Etsy site for more Frightening Fabrics!

Wednesday, October 20, 2010

Times, they are a changin'...

There has been so much going on here, we've forgotten to post!

1. We recently just launched our new website just brimming of great information and the ability to shop securely online. We are very excited about this new site. It has options to sign up for our newsletter, contains coupons and has a Yardage Helper to help you decide how much fabric you need for your project. Most importantly it will soon contain fabrics and notions not found in our store or Etsy shop!


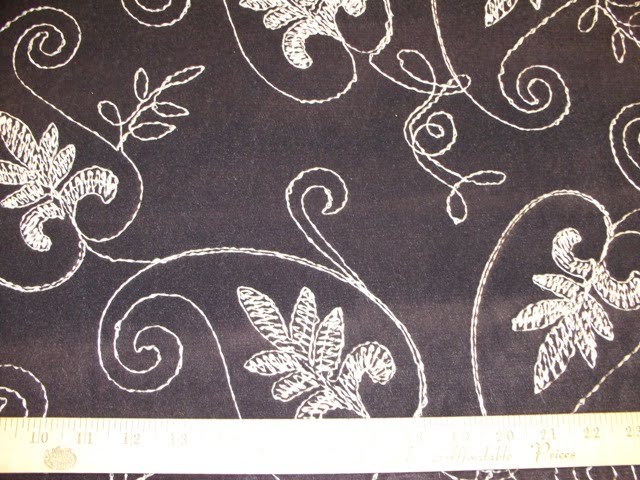
2. We have been getting in new and exciting fabric and notions. We now carry all the things you crave like vinyl, muslin, batting, machine needles, thread in every color of the rainbow, elastics and we are pulling some amazing vintage fabric that is to die for. For example, below is a gorgeous, vintage embroidered velvet. We aren't through yet either! So stay tuned!


3. The store is more organized and easy to shop than ever. If you've ever been in our store, you know that we are filled to the rafters with fabrics but now the store is set up to make is easier to find what you need fast while retaining that treasure hunt feel when you have time to take in all the fabrics. As always our knowledgeable and helpful staff is always on hand to help you with whatever you need. From advice on a sewing machine to how much fabric you need for your curtains, we are there. You can always call us and email us.


So as you can see, we are a changin'! Please sign up for our email list on our website for news on our ever changing store. We look forward to seeing you!

Tuesday, August 31, 2010

Halloween Fun - Toga, Toga, Toga!

We have a vintage mannequin in store that we call Midge. Midge is usally kicking around in a sequin tube dress (Which we sell by the way.) but since Halloween is coming up, I thought it would be nice to help her get into the spirit and dress her up accordingly.
The other day she was in the mood for toga. She was feeling very Helen of Troy so we decided to deck her out in the best of Roman finery and it couldn't have been easier.
Here is what I did....

- Take 2-3 yards of opaque fabric with a nice drape. I used a heavy ribbed taffeta. Reminds me of a big version of grosgrain ribbon. All opaque fabric with a drape would work for this. Slinky fabrics like rayon might just be too slinky and will slide.
- Place over shoulder of your choice and let the fabric hang even at the bottom front and back.

- Take the front part of the hanging fabric and put it around your waist and use a safety pin to secure it at the base of you back. Let the back part drape. You can then take some more safety pins and secure it down the back or over your tush. If you know how to sew, pin down the back and make a simple seam.
- Adjust the front fabric over your bust. Might be a good idea to wear a bathing suit or leotard underneath.

- If you wish you can stitch the bottom hem and the back drape with your machine or by hand. I used a blind stitch.

- Take a a cool piece of trim or belt and tie around your waist. The trim I used was white with a silver Roman Key design.

- Make sure all raw edges are folded into the drapes.

- Accessorize with your favorite gladiator sandals, earrings or even a laurel wreath and you are done!

So simple and so much fun. Such a better quality then the stuff you can buy at stores. Also, it doesn't have to be just a toga. You can use this costume to be Cleopatra or even add a corset for a witch's costume and so on.
Here are some other looks Midge tried on! The first photo features a vintage bugle bead, embroidered belt I call the "Lady Gaga Belt". Makes it feel sort of Egyptian. The second photo has a more elaborate vintage belt that has a velcro back perfect for the look. Both belts sell at $10 at our store!


So if you are interested in any of the fabric, trim or belts featured here in this post, please do not hesitate to contact us by phone, store or our Etsy shop. Those belts are just too cool and you can not beat the price!

So have fun and stay tuned for more easy to make Halloween costumes. :)